How to Sign a Message Manually
If your wallet or device is not yet supported in Hoseki’s guided flows, you can still complete verification by signing a message manually. Our recommended tool for this is Sparrow Wallet.
Note: If you are having trouble finding your account identifier (XPUB) in Sparrow, please take a look at this guide for instructions.
Before you start
- If you use a hardware device (e.g., Keystone, BitBox, or Passport), we recommend connecting it to Sparrow for signing.
- If your keys are stored in software (not on a separate device), follow the separate guide for your specific wallet.
- If your device is not already set up in Sparrow, you can import it — Sparrow supports a wide range of import methods.
Note: If you’re using a Jade, we recommend the Blockstream wallet for signing. See our Sign a Message Through Blockstream guide for instructions.
Step 1 — Connect or import your wallet in Sparrow
- Open Sparrow Wallet.
- Connect your hardware device or import your wallet using the method supported by your device.
- Confirm that your account appears correct and everything is up to date.
Step 2 — Locate your first receive address
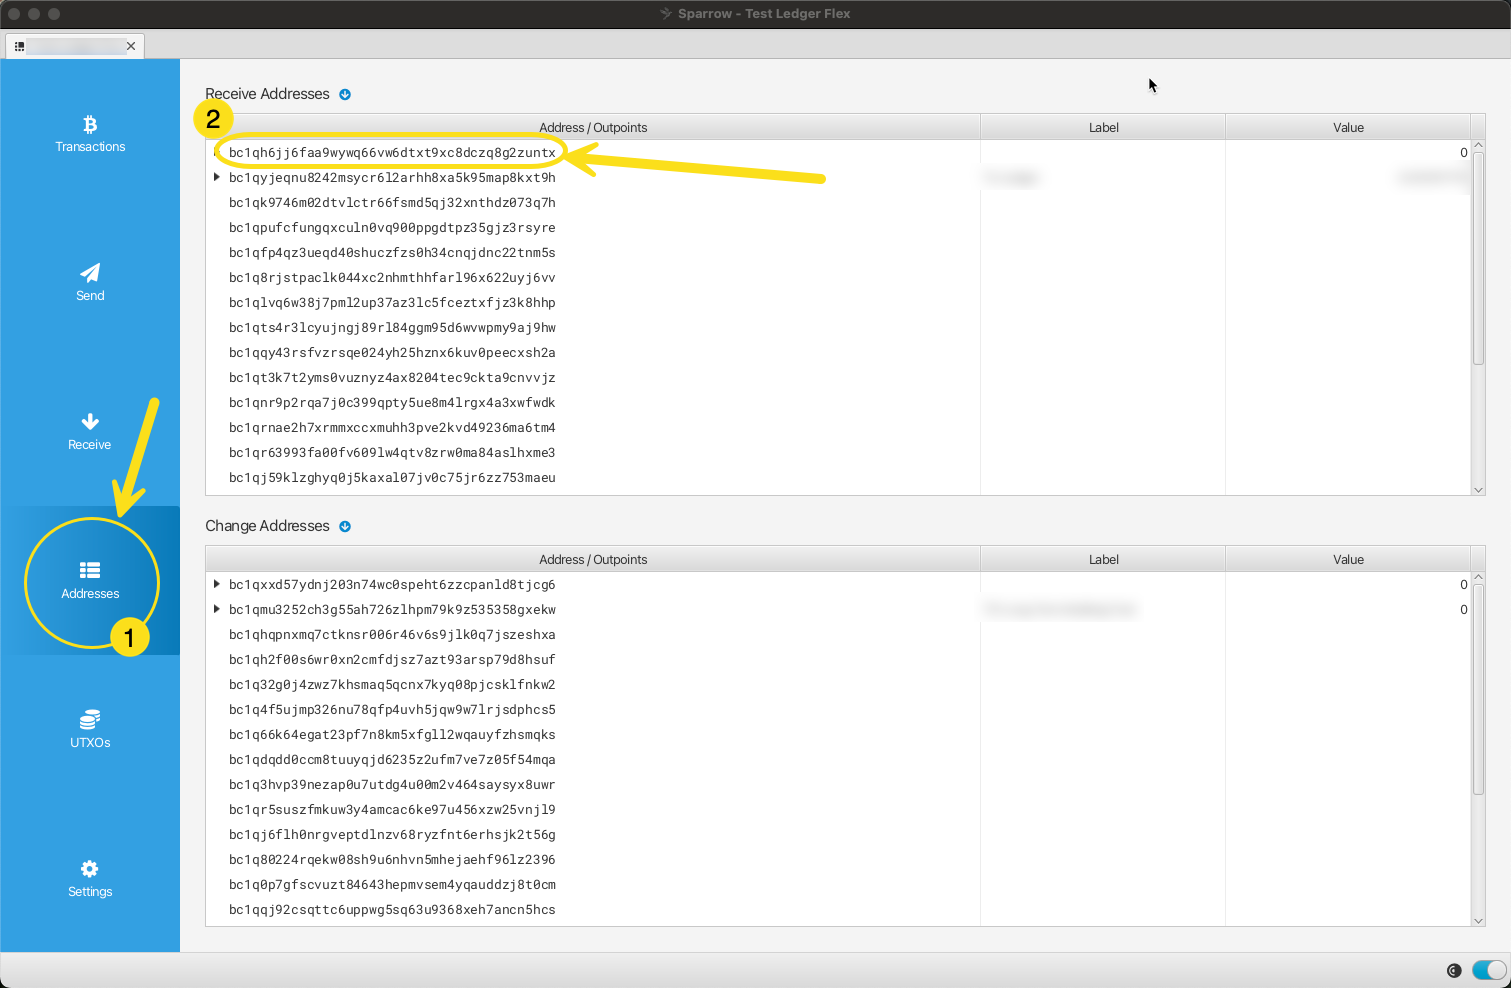
- Go to the Addresses tab in Sparrow.
- Locate the first receive address in the list.
Step 3 — Open “Sign Message”
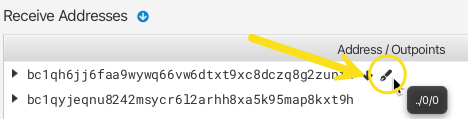
- On the first receive address row, click the pen icon to open the Sign Message dialog.
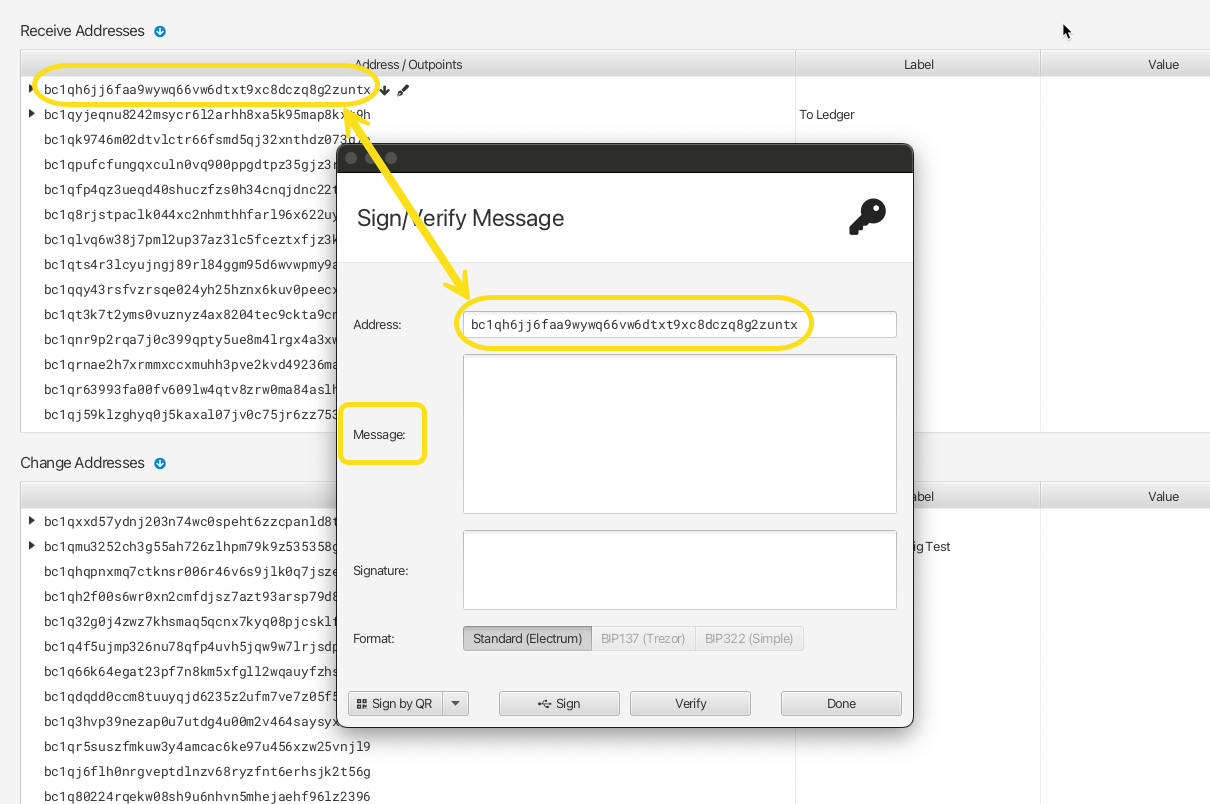
- Sparrow will display a form where you can enter the message to be signed. Make sure the address matches the first “Receive” address.
Step 4 — Get your message from Hoseki
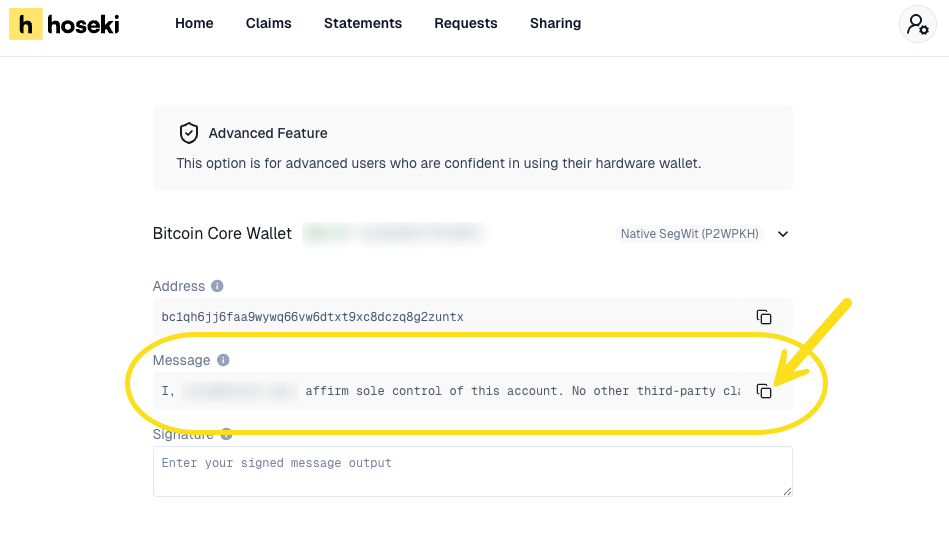
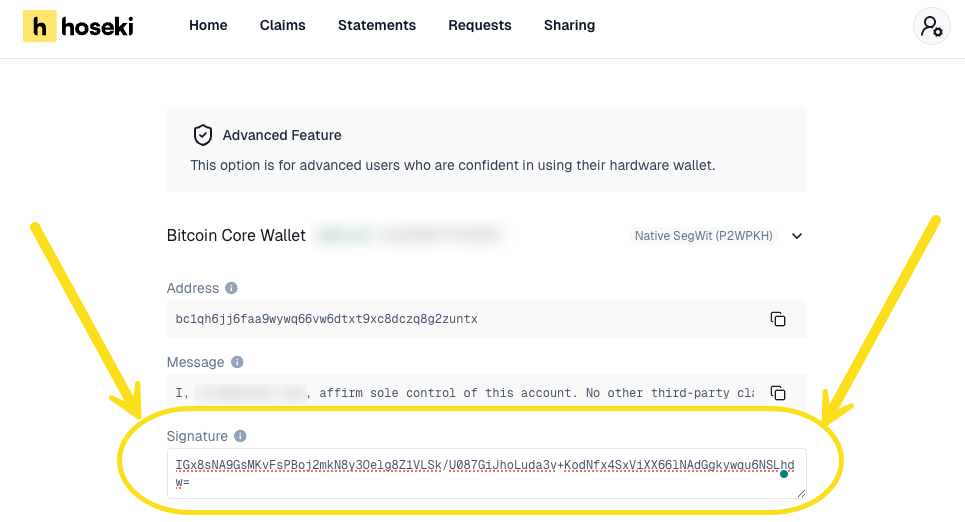
- In your Prove portal, go to your claims and add a new claim using the “Advanced” option.
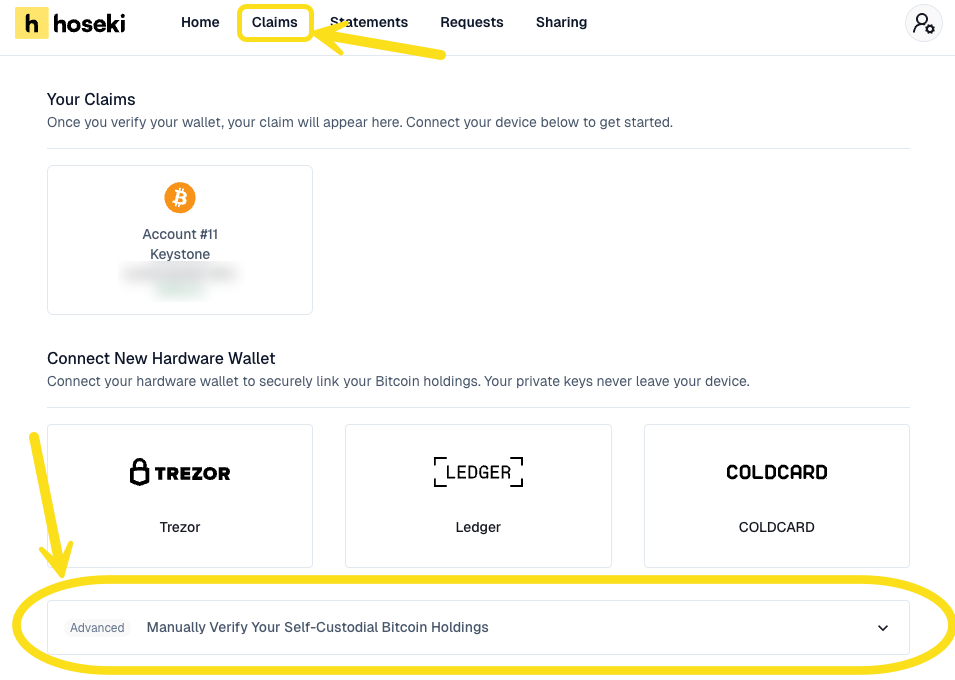
- Name your claim for easy reference and input your account identifier (XPUB).
- Copy the message provided by Hoseki — this is the message you’ll sign in Sparrow.
Step 5 — Sign the message
- In Sparrow, paste the Hoseki-provided message into the Message field.
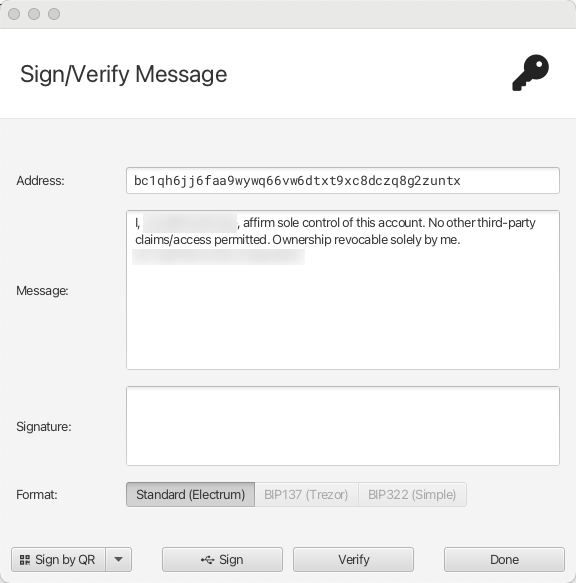
- Verify that the Address shown in Sparrow matches the one Hoseki expects.
- Click Sign. If you’re using a hardware device, follow the prompts on your device to generate the signature. You can choose the method that works best for you — QR signing is often the easiest, but you can also connect your device via USB or use an SD card to transfer the data.
Important: Signing a message is not the same as signing a transaction. Using your private key to sign a message does not expose or threaten its security, nor does it put your funds at risk. It simply proves ownership of the address — your Bitcoin cannot be moved or spent through this process. For more details, see our guide on message signing.
Step 6 — Return the signature to Hoseki
- Once signed, Sparrow will display the Signature value.
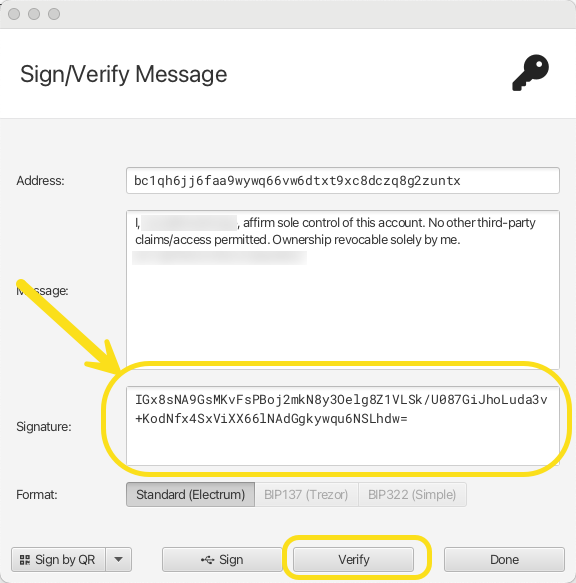
- You can verify the signature is correct first in Sparrow by selecting the “Verify” button.
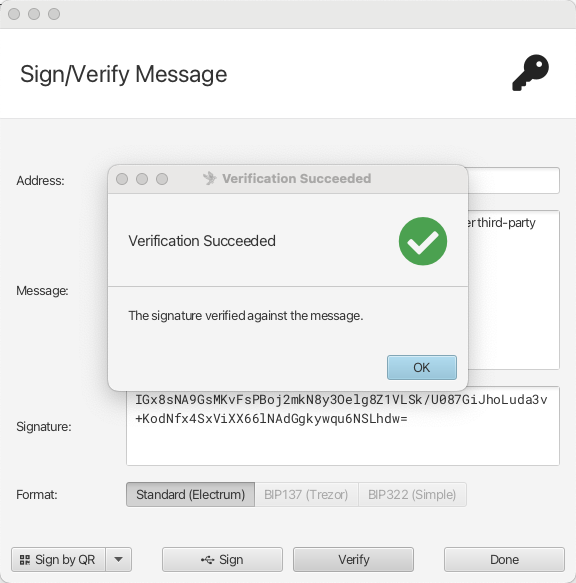
- Copy this signature and paste it into Hoseki’s manual flow where requested.
- Select “Verify” to complete verification.
If you have any questions or run into any issues, contact us at support@hoseki.app.