How do I connect my Bitcoin?
When you connect your Bitcoin to Hoseki Prove, we create what we call a claim — your verifiable receipt of ownership in Bitcoin’s finite supply. You connect a wallet or device, sign a message, and we verify that signature and register it as a claim in your account.
How to add a claim
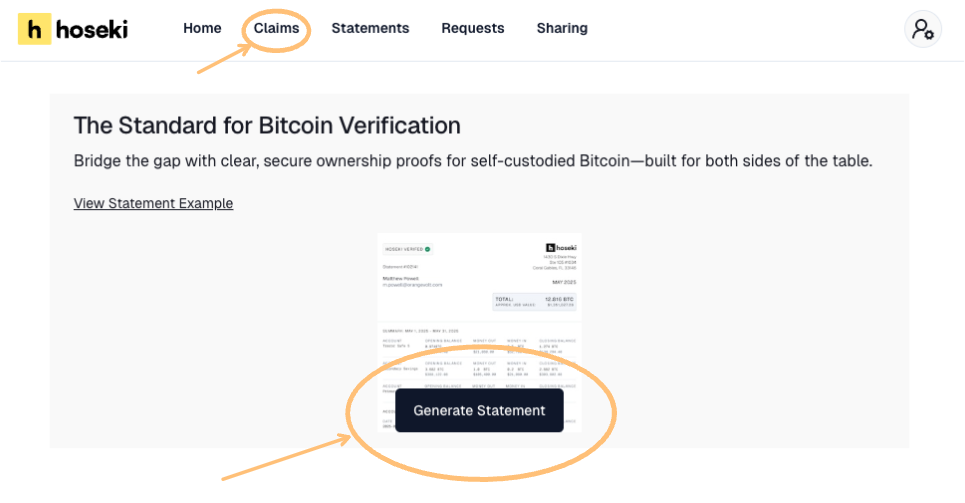
From the Home screen, click Claims in the header or begin generating a statement.
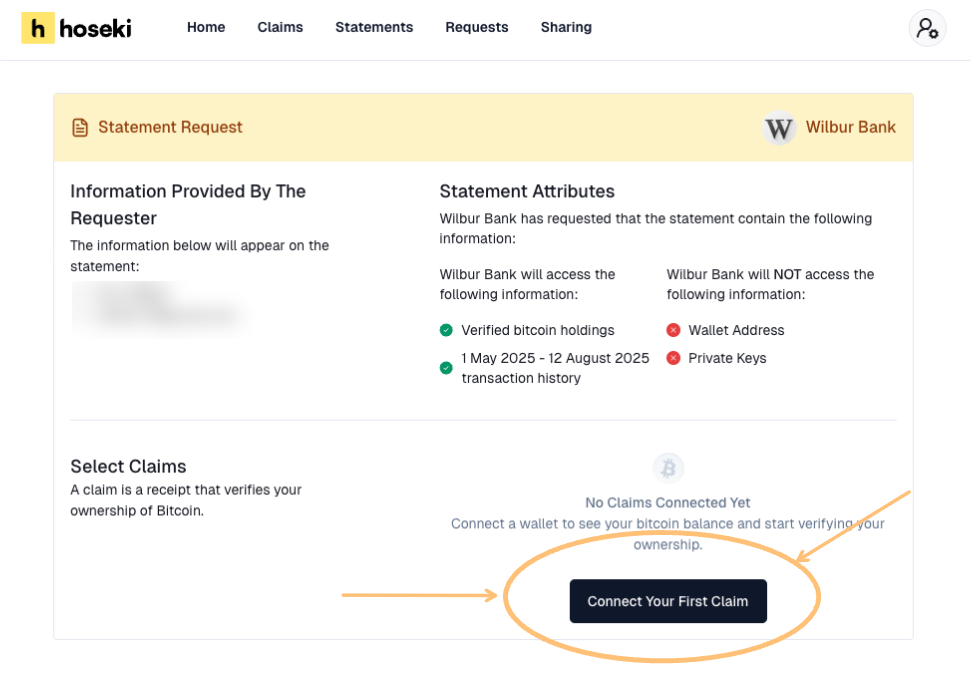
If you have an Access Request, you can add a claim by responding to it and clicking the link within the request.

Claims can then be added while responding to a sharing request, a statement request, or when generating a statement for yourself:
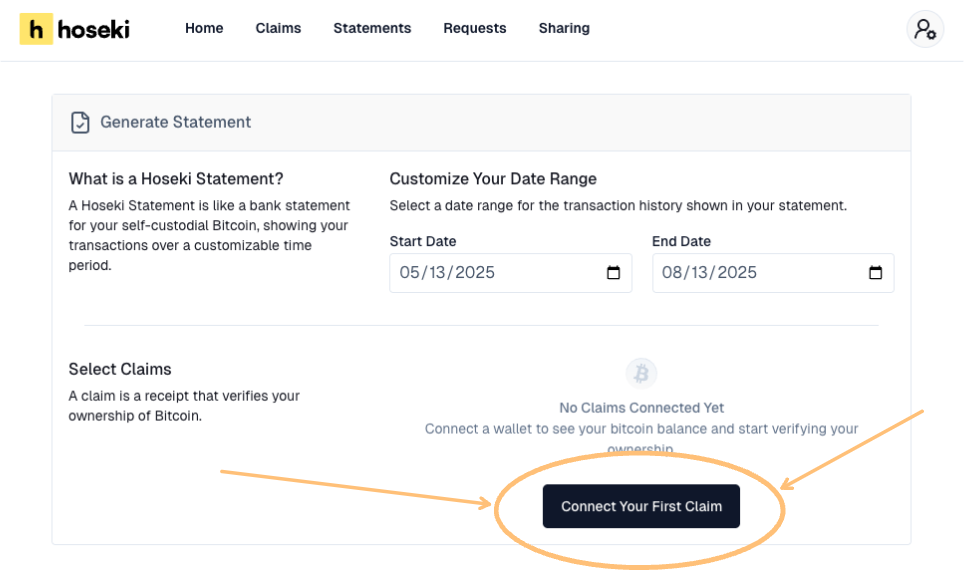
Each of these paths takes you to the Claims screen, where you can choose either the guided flow — which walks you step-by-step through proving your Bitcoin — or the manual flow for advanced users who are comfortable with their wallet software or are using a device we don’t yet support with a guided flow.
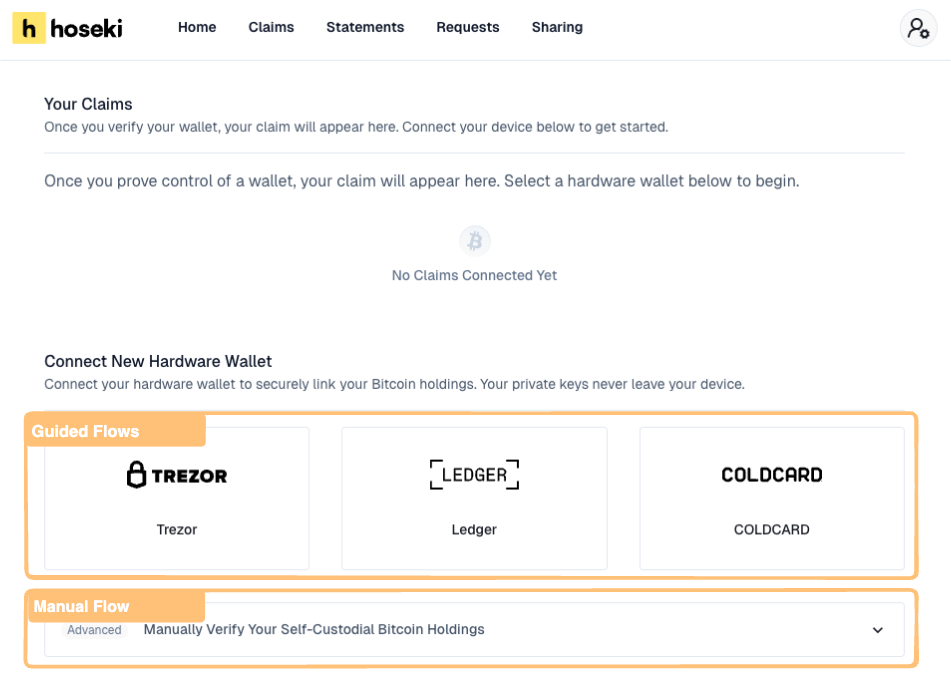
Step 1: Choose your flow
Guided flow (recommended)
Use this if you have a supported hardware wallet. We currently support: Trezor, Ledger, and Coldcard.
- Select your device and follow the on-screen prompts.
- Approve any USB/bridge permissions and confirm on your device.
Manual flow
Use this for any wallet or device not listed above — or if you prefer using your wallet software directly. You’ll sign a message in your wallet and paste the signature into Prove.
- How to sign a message with Sparrow
- How to sign a message with Blockstream
- How to sign a message with Bluewallet
Step 2: Connect and sign
- Follow the guided or manual steps to connect your wallet or device.
- Sign the provided message to prove control. Once verified, your claim will appear in your account.
If you have any questions, or if something doesn’t look right, don’t hesitate to reach out to us at support@hoseki.app.